
Before You Begin
- Bluerooms
- Jun 3, 2020
- 5 min read
Updated: Jun 29, 2020
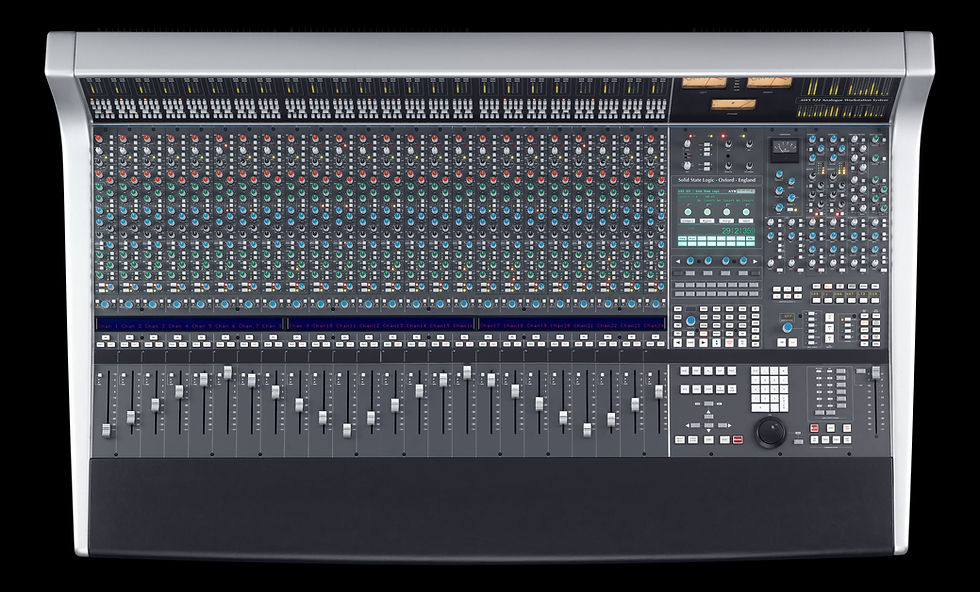
Bluerooms 1 is a 24 channel recording studio based around an SSL AWS 924 Delta.
Before you begin your session it is important to reset the desk to our working default.
Please remember to return the desk to this state when your session is over.
Before You Begin:
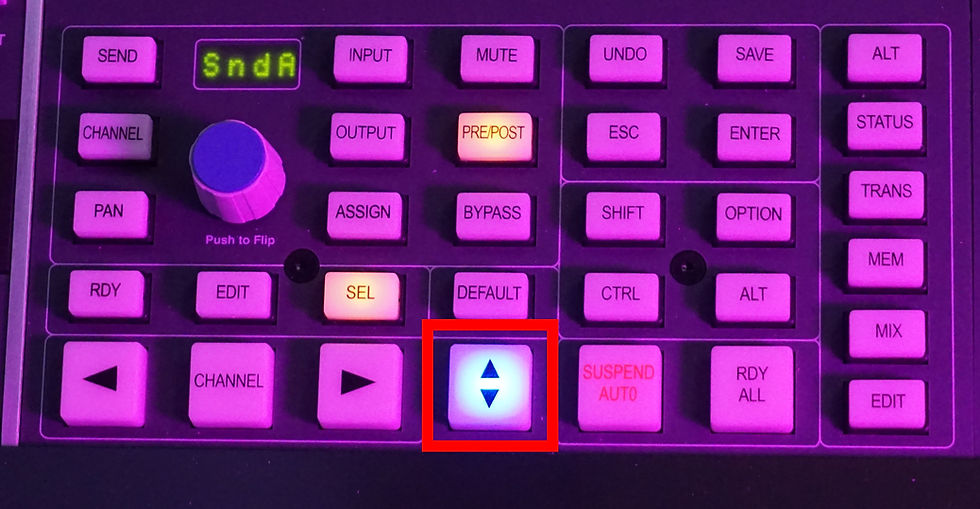
1. Before you begin to return the desk to it’s default make sure that the desk is in “Analogue Focus Mode”. To do this check that the “Focus Switch” is in Analogue Focus.
The Focus Switch is to the right of channel 24’s Solo and Cut buttons. The button is as shown, an upwards and downwards arrow.
When illuminated Blue, the desk is in Analogue Focus, when not illuminated the desk is in DAW Focus.
Monitor Control, Mode, Source and Selection:
1. Firstly, ensure that none of the Misc level LEDs next to the Monitor level control are active.
Then ensure the monitor control level is set to 0 (displayed as “OFF”)
Make sure that the monitor dim button is off. The dim button lights up yellow when active.
And check that the cut button is also off. The cut button acts as a mute for the monitors and lights up red when active.

2. Moving over to the monitor mode section, make sure all of the buttons in this column are off.
Remember the buttons are illuminated when active.

3. Next we’ll look at the monitor source section.
As there are multiple audio paths within the 924, this section allows you to select the audio path you wish to monitor.
In our case we’re going to monitor the “MIX” bus.
Firstly make sure that the “SUM” button is not illuminated, then simply hit “MIX”.

4. Next, we need to make sure we have the correct set of monitors selected.
The 924 supports 2 sets of 5.1 speakers, and 2 sets of stereo speakers.
In our setup, the Genelec 1037C monitors are connected to the desks main output that is connected when none of the Monitor select buttons are active. To deselect a monitor and return to the main set simply press the active button once and the main outputs will be active.
Secondly the Genelec 8040A monitors are connected to the ALT 5.1 button.
Make sure that neither “MINI A” nor “MINI B” are active as no speakers are connected to their outputs.

5. Finally ensure that none of the monitor outputs have been muted.
To do this simply make sure none of the Monitor Mute/Solo buttons are illuminated.

Resetting the Channel Strip — Gain Stage:
1. Now it is time to begin resetting the channel strips. Here we will walk you through one channel strip. As each channel is simply a copy of the last.
However they all require resetting.

2. At the top of the channel strip we have the Gain section.
Firstly, ensure that the red gain pot is turned all the way to the left, the +48v button and Pad button are both off.
Next check that the phase invert button (Ø), Instrument input selector (“INST”) are also off.
Finally make sure that the grey line gain dial is set to the central point (+/-0dB) and hit the flip button so that the green LED is lit.
Tip: The Flip button and several other “soft switches” can be set across the whole desk simultaneously using the function keys.

Resetting the Channel Strip — EQ:
1. Moving further down the channel strip we reach the EQ section
Firstly check that all of the EQ gain dials are set centrally to +/-0dB. The gain dials are highlighted in the photo. Also make sure that the HPF dial (the black dial at the top of the EQ section) is set all the way to the left.
Optionally you can also reset the Frequency Select and Q dials to their minimum values.
Now check that the “BELL” buttons at the top and bottom of the EQ, the “G-EQ” and “PRE” buttons are not active. (The buttons are active when depressed, and inactive when not pressed).

Resetting the Channel Strip — Direct and Sends:
1. Moving on we reach the Aux sends section and Direct Channel Outputs.
Firstly, ensure that the direct output button is enabled. The LED next to the button should be illuminated RED.
Don’t worry if the LED is GREEN, we will cover how to change that in the next section.

2. Next ensure that all of the green Sends dials are all the way to the left (-∞) and that the orange “On” LEDs are off.
To turn the LEDs on or off press down on the respective gain dial, you will feel a faint click and the dial’s state will be changed. Altering of the On/Off State is a soft switch.
Also make sure that the “ST CUE” pan dial is set to the Centre and that the “POST” button is not depressed.

3. Next make sure that the “CUE B”, “FX3” and “FX4” button are depressed.
Finally make sure non of the “EFX” buttons are active (their LEDs will be illuminated Green if they are active).
By deactivating the EFX buttons the Direct LED should no longer be green, if it isn’t illuminated at all simply press the button once and the red LED should illuminate.

Resetting the Channel Strip — Busses:
1. Now it’s time to look at busses.
Firstly we’ll look at the Mix and Record Busses.
Simply ensure that the “MIX” bus is active and the “REC” bus is inactive. When active the LEDs light up Green and Red respectively.
The “MIX” and “REC” buttons are soft switches.
Also check that the pan control is centred.

2. Next we need to look at the Track busses.
Track busses are located on the metre bridge above the gain section.
To return to the default ensure that non of the buttons in this section are active.
The track busses (1−8), “IP”, “OP” and Dynamics selectors (1−2) all illuminate when active.
Also check that the “PRE” and “PAN” buttons are depressed.

Resetting the Channel Strip — Fader Section:
1. Finally we move onto the Fader and Pan Section.
Firstly check that the fader is all the way down (-∞).

2. Next ensure that the channel is not “CUT” (Muted) or Soloed. The Cut and Solo buttons light up Red and Yellow Respectively.
Note: If another channel is soloed the channel you are resetting will appear to be Cut and pressing the Cut button will have no effect. If this is the case check that no other channels are soloed by pressing the “SOLO CLEAR” button on the far right of the desk in the monitor mode section.

Master Fader Section:
1. Now that we have reset our channel strips and monitor it’s time to reset the Master fader section.
There are two parts to the master fader section, the Mix/Rec Function matrix and the master fader.

Mix/Rec Function Matrix:
1. As there are two main busses audio can be routed down (Mix & Rec), this requires a matrix to assign functions to either the Mix or Record bus or in some cases both.
Operating the Matrix involves two button presses. Firstly the selection of which bus you wish to assign a function too and then the selection of said function.
To return the desk to it’s default simply hold the mix button and deactivate all of the functions (functions are active when their respective LEDs are lit) except fader.
Repeat this step with the Rec Bus.

Mix/Rec Master Fader:
1. Ensure the Mix-Fader function is active then push the main stereo fader to minimum.
Remember to do the same with the Rec Bus.
Note: The Master Fader can only control the Rec or Mix bus not both at the same time.

Comentários